Working with video can become complicated when every small task requires a different application. One program may be needed for trimming, another for conversion, and another for compression or subtitles. For people who only work with videos occasionally, installing and maintaining several applications may not be practical. Browser-based video tools offer another approach by bringing many basic functions into a web environment.
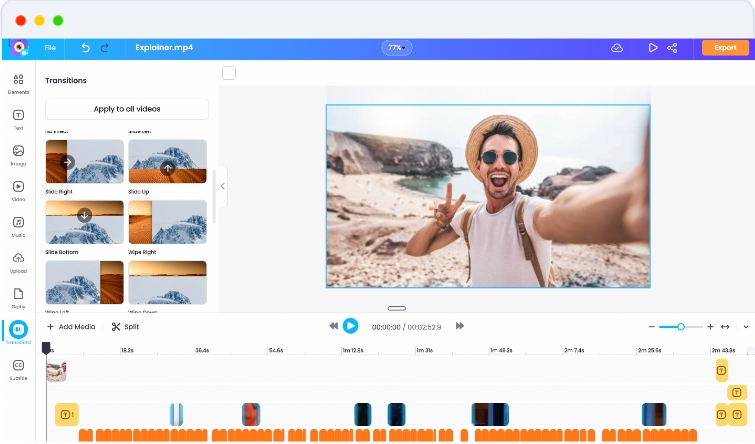
A simple online workflow does not need to involve dozens of services. The goal is to create a clear process that moves a video from its original state to a finished version while keeping quality, privacy, and organization in mind. With the right sequence, everyday video tasks can often be completed without installing specialized software.
The most useful workflow depends on the type of content being handled. A short social video may need trimming and resizing, while an educational recording might require compression, captions, and audio adjustments. Understanding the stages involved makes it easier to select the right browser tools for each project.
Start With the Original Video
Every reliable workflow begins with the original file.
Before uploading a video to an online service, create a separate working copy if possible. This protects the original recording in case an editing process produces an unwanted result.
The original file should be kept in a safe location with enough storage space. If the video is important, consider maintaining another backup as well.
Working from a copy also makes experimentation safer. You can try different compression levels, dimensions, or formats without permanently changing the source.
Decide What the Finished Video Needs
Before opening any browser tool, determine what you actually want to accomplish.
A simple project might only require trimming. Another video may need cropping, compression, format conversion, captions, or a combination of several tasks.
Writing down the required steps can prevent unnecessary processing.
For example, if a video needs trimming, resizing, and compression, you already have a basic workflow. There is little reason to process it through unrelated tools that do not contribute to the final result.
Check the Video’s Technical Details
Understanding the source file can make the rest of the workflow easier.
Important details include resolution, file format, frame rate, duration, file size, and sometimes the video codec.
A high-resolution recording may require more processing time and storage than a smaller file.
Knowing the starting specifications also helps you avoid unrealistic expectations. A low-quality recording cannot become genuinely detailed simply by exporting it at a higher resolution.
Trim Unnecessary Footage First
If a recording contains unwanted sections at the beginning or end, trimming is often a good first step.
Removing unnecessary footage early can reduce the amount of material that needs to be processed later.
For example, a ten-minute recording might contain several minutes of preparation before the useful content begins. Removing those sections can make the final project smaller and easier to manage.
Keep the original file available in case you later discover that you removed something important.
Organize Multiple Clips Before Combining Them
Projects sometimes contain several separate recordings.
Before merging them, identify which clips belong in the final sequence and decide their order.
Giving files clear names can make this process much easier. Names based on subjects, dates, or sequence numbers are generally more useful than generic names such as video1 or newvideo.
Once the clips are organized, a browser-based merger or editor can combine them into one file.
Choose the Correct Video Format
Format selection should be based on how the finished video will be used.
A widely supported format can be convenient when the video needs to work across different devices and applications.
However, there is no universally perfect format for every situation.
Think about where the video will be played, uploaded, edited, or stored before choosing the output format. Selecting the destination first can prevent unnecessary conversions later.
Resize Only When Necessary
Changing the resolution can make a video easier to store, upload, or share.
For example, a very high-resolution source may be unnecessary when the finished video will only be viewed on a smaller display.
If you resize a video, maintain the original aspect ratio whenever possible.
Avoid enlarging small videos simply to create a larger file. Upscaling can increase dimensions without restoring details that were never present in the source.
Adjust the Aspect Ratio Carefully
Different platforms and viewing environments can use different frame shapes.
A horizontal video may need to be converted into a vertical format, while another project may benefit from a square frame.
Browser tools can crop or reposition footage to fit these requirements.
Preview the complete video before exporting. Important faces, objects, text, or other details should remain inside the visible area.
Improve File Size After Editing
Compression is often more effective after unnecessary footage and unwanted visual areas have been removed.
There is little reason to spend processing time compressing sections that you already know will not be part of the final video.
Online compressors can create smaller versions by changing bitrate, resolution, codec settings, or other characteristics.
Use moderate compression when quality matters. Very aggressive compression can create visible artifacts, blurry details, or blocky areas.
Add Captions When They Improve Accessibility
Captions can make video content easier to understand in environments where viewers cannot use sound.
Browser-based captioning tools may allow manual subtitle creation or automatic transcription.
Automatic transcription should always be reviewed before publishing.
Names, specialist terminology, background noise, and unclear speech can lead to mistakes.
Correcting those errors is particularly important for educational, instructional, and informational videos.
Review the Audio Separately
Good video quality does not compensate for poor audio.
Listen to the processed video before publishing it. Check whether voices are clear and whether background music is too loud.
If the original recording contains unnecessary sound, a browser-based editor may allow you to reduce, mute, or replace the audio.
For advanced restoration, however, dedicated audio software may provide better control.
Add Basic Text or Branding
Simple browser editors can often add titles, labels, or watermarks.
Use these elements carefully.
Text should remain readable without covering important visual information. A watermark should identify the content without becoming the main focus of the video.
If the video contains educational information, descriptive text can also help viewers understand what they are seeing.
Create a Suitable Thumbnail
The thumbnail is often the first visual element viewers notice.
A browser-based image or video tool can help capture a useful frame or create a simple thumbnail.
Choose an image that accurately represents the content.
Avoid making the thumbnail misleading simply to attract attention. Clear and relevant visuals generally provide a better experience for viewers.
Preview the Entire Project
Do not assume that an exported video is correct simply because the processing finished successfully.
Watch the complete result when possible.
Check the beginning and ending, transitions, captions, audio synchronization, image quality, cropping, and overall presentation.
A tool can successfully create a file while still producing an output that does not match your expectations.
Check the Exported File
After downloading the finished video, inspect its technical properties.
Confirm that the resolution and format are appropriate for the intended destination.
Also check the file size.
If the output is much larger than expected, you may need to adjust the compression settings. If it is unusually small and the quality has dropped significantly, a less aggressive export may be better.
Keep Versions Organized
Video projects can quickly produce several files.
For example, you might have the original recording, a trimmed version, a compressed copy, and a final export.
Using clear filenames can prevent confusion.
A simple naming system can include the project name and version number. This makes it easier to identify the latest file without accidentally deleting an important earlier version.
Avoid Unnecessary Re-Encoding
Repeatedly converting the same video can reduce quality.
If a video is converted several times, it may experience additional compression with each generation.
A better approach is to perform the required changes and create the final version from the best available source.
When possible, combine compatible operations into fewer processing steps.
Consider Privacy Before Uploading
Online video tools process files on remote servers in many cases.
Before uploading private or sensitive footage, review the service’s privacy information.
Understand whether files are stored temporarily, whether they are automatically deleted, and whether an account is required.
Personal recordings, confidential business material, and private documents visible inside a video deserve additional caution.
For sensitive projects, local software may provide greater control.
Protect Your Account and Files
If a browser tool requires an account, use appropriate security practices.
Avoid reusing passwords across unrelated services.
Be cautious when granting permissions to websites and review the permissions requested by your browser.
If you are working on a shared computer, remember to remove downloaded files when appropriate and sign out of accounts after completing your work.
Plan Around File Size
Large video files can take considerable time to upload and download.
This becomes especially noticeable with high-resolution recordings.
Before starting a browser-based workflow, check the service’s maximum file size.
If the file exceeds the limit, you may need to reduce its size first or use a different approach.
A stable internet connection also makes the process more reliable.
Use a Small Test File First
When trying a new browser tool, avoid starting with your most important recording.
Test the service with a short, non-critical video.
This gives you an opportunity to understand the interface, processing speed, output quality, and any restrictions.
Once you are comfortable with the results, you can move on to larger projects.
Combine Tools Only When Necessary
Using several browser tools does not automatically create a better workflow.
Every additional upload and download adds another processing stage.
If one reliable tool can handle several required operations while maintaining acceptable quality, it may be more convenient than moving the file between multiple websites.
Keep the workflow as short as practical.
Know When to Stop Using Browser Tools
Browser-based services are useful for many everyday tasks, but they are not ideal for everything.
Complex multi-track editing, long professional projects, advanced color correction, detailed audio production, and large batches of videos may benefit from dedicated desktop software.
The purpose of an online workflow is convenience, not replacing every type of video application.
Choosing the right method for the project can save more time than trying to force every task into a browser.
A Practical Browser-Based Workflow
For many simple projects, the process can follow a straightforward sequence.
Start by preserving the original file. Identify the required changes and inspect the source properties. Trim unwanted footage and organize the clips. Adjust the format, dimensions, or aspect ratio if necessary. Add captions, text, audio changes, or other basic elements. Compress the finished version when a smaller file is required.
After processing, download the result and watch it completely. Check the quality, audio, captions, and framing. Store the final version separately from temporary working files.
This approach keeps each stage purposeful and reduces unnecessary processing.
Conclusion
A browser-based video workflow can be surprisingly effective when it is built around a clear sequence of tasks. Instead of installing several applications, you can use suitable online tools for trimming, conversion, resizing, compression, captions, basic editing, and other everyday requirements.
The key is to remain organized. Start with a protected original, understand the video’s requirements, use only the tools you need, and review every final export before publishing or sharing it.
Privacy should also remain part of the process. Online convenience is valuable, but sensitive footage deserves careful handling. When projects become large or technically demanding, dedicated software may still be the better option.
For simple video work, however, a well-planned browser workflow can reduce software clutter while providing a convenient way to complete common tasks from almost any modern device.